Apple Mac Pro Cheese Graters make for a pretty sweet lego like substrate on which to run a Home Lab. In this post we’ll tease apart the ole Mac Pro and highlight its use as a Development and Virtualization Lab machine.
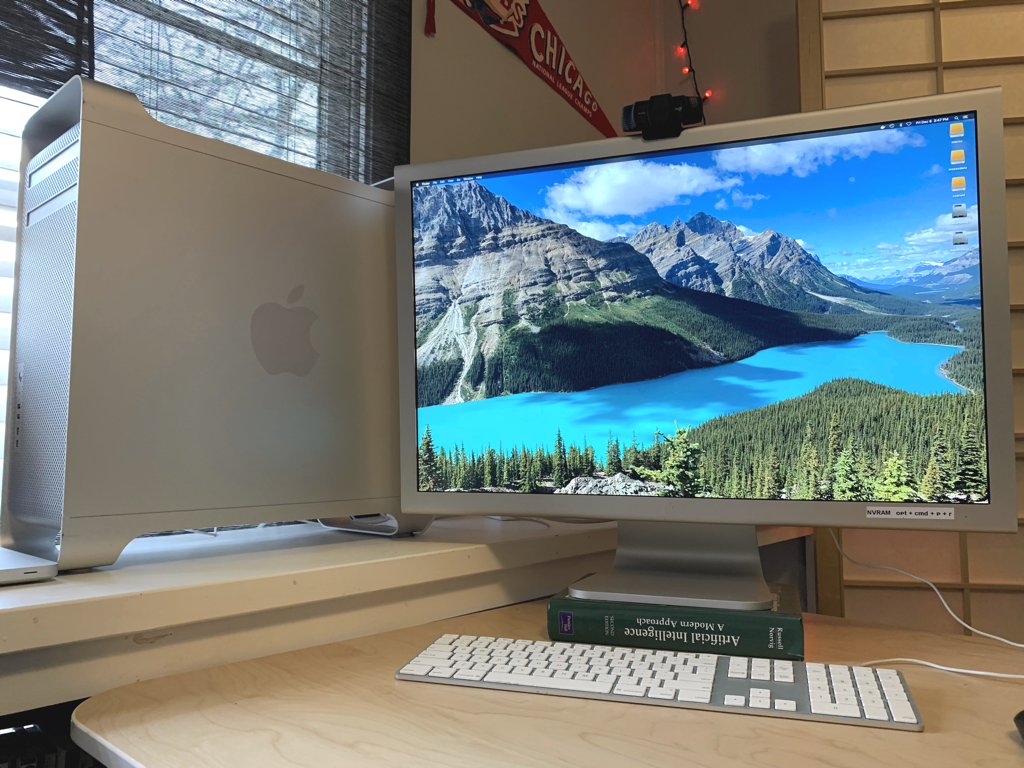
For those that don’t know, Apple use to make expandable workstation/server class machines, completely opposite of the Apple boxes of today. From 2009 to 2012 Apple sold Mac Pro Cheese Graters of various configurations and many are floating around for sale on Facebook Marketplace, Craigslist and Ebay. The good thing about Mac Pros from this era is they can be modernized and deployed various ways in a Home Lab environment. Let’s dive in…
What makes Mac Pro Cheese Graters relevant today?
- Server Class chips that go zoom…Dual Intel Xeon CPUs (for example 3.46 GHz Intel Xeon X5690s)
- Max out at 128 GB 1333 MHz Memory, that’s a lot of headroom for Data, VMs and Containers!
- Internal Expansion! 4 PCIe 2.0 slots (2x16 and 2x4), go NVMe, RAID controller, 10 GB nic?
- Low cost when compared to latest and greatest Apple machines
What makes the Cheese Graters smell like stinky cheese?
- The internal SATA II/3GBs storage bus, native storage is glacial (PCIe expansion helps here)
- macOS limited to Mojave as of Fall 2019, going beyond this is unsupported by Apple.
- Bringing it current, which requires paving bits in the right order.
- Power Consumption is 150-175W under nominal load (Sleeping is always an option tho)
The Mac Pro
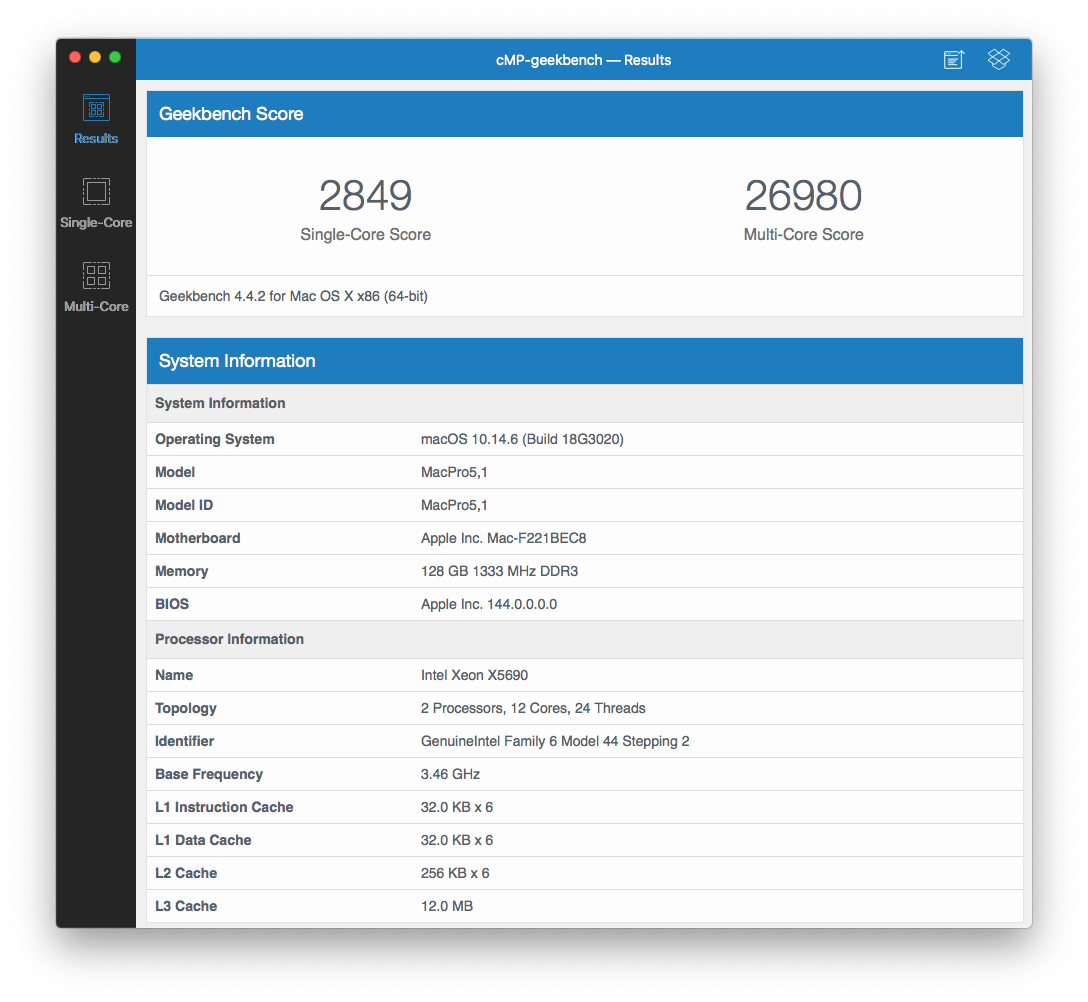
The Mac Pro 2009-2012 came in 2 basic configurations; single-core and dual-core. All the Mac Pros used in my RetroMac Lab and one’s I modernize for resale are dual-core. The official 2009 models is a 4,1 and 2010 & 2012 models are 5,1. Other than the model designation and Firmware code the 2009-2010 are identical and thus why it’s easy to upgrade the Firmware of a 4,1 to 5,1 which is required to unleash hardware goodness (NVMe support) and macOS Mojave.
What’s the net of this?
That any 2009-2012 Mac Pro can be brought up to the latest Apple Firmware which allows for Mojave installation as well as other benefits such as booting from a PCIe attached NVMe drive.
Basically…you get a beast of a Dev Box at a fraction of the cost of a new Apple machine.
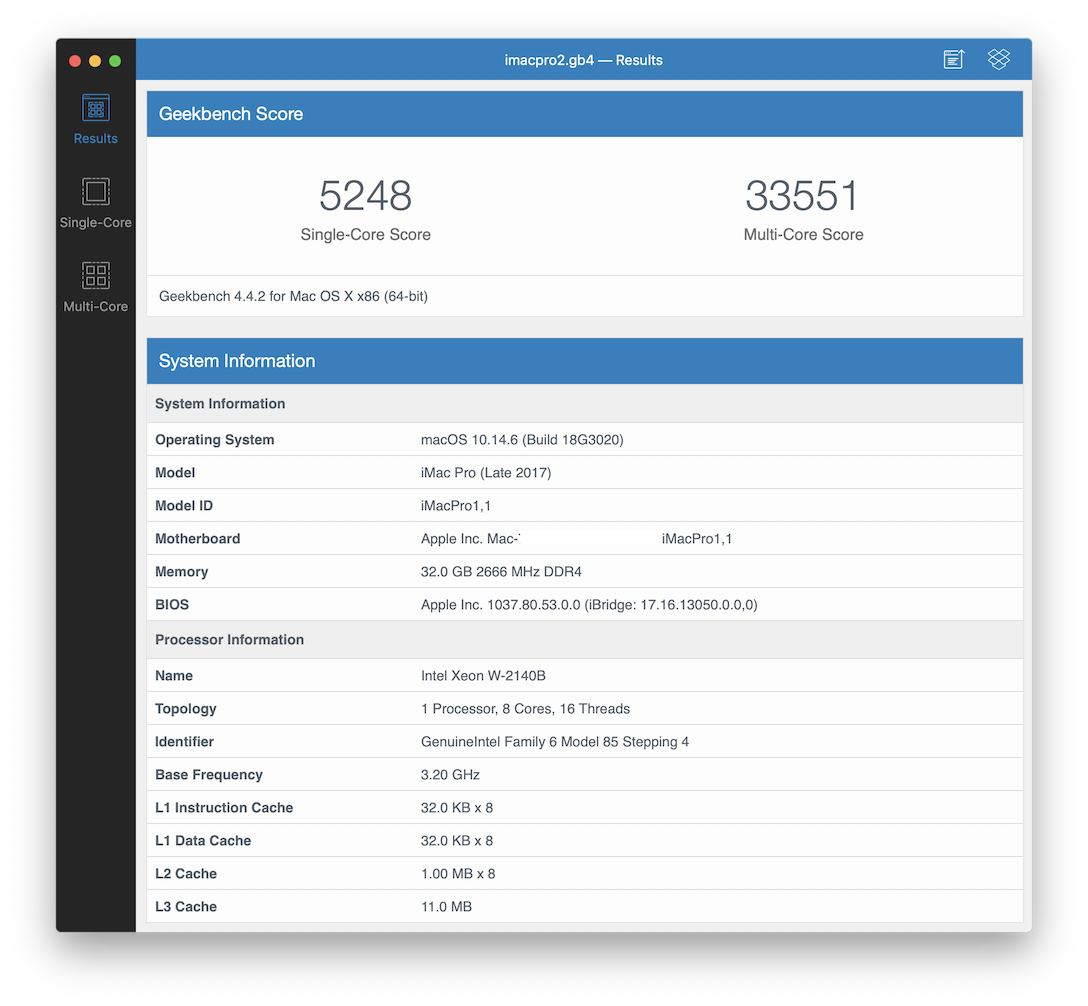
Quick Compare to iMac Pro 2017
| Mac Pro (Mid 2010) | iMacPro 2017 |
|---|---|
|
 |
 |
 |
| macOS Mojave 10.14.6 | macOS Mojave 10.14.6 |
| Boot ROM 144.0.0.0.0 | Boot ROM 1037.40.124.0.0 |
| MacPro5,1 | iMacPro1,1 |
| 2 x 3.46 GHz 6-core Intel Xeon X5690 | 3.2 GHz 8-core Intel Xeon W |
| 128 GB 1333 MHz DDR3 | 32 GB 2666 MHz DDR4 |
| 1 TB NVMe startup disk | 1 TB NVMe startup disk |
| Sapphire Pulse Radeon RX 580 8 GB | Radeon Pro Vega 56 8 GB |
| GB4 2800/26000 | GB4 5300/34000 |
| GB4 GPU Metal 134000 | GB4 GPU Metal 135000 |
| GB4 GPU OpenCL 131000 | GB4 GPU OpenCL 140000 |
| AJA Disk Test 1400 MB/s read | AJA Disk Test 3000 MB/s read |
| AJA Disk Test 1500 MB/s write | AJA Disk Test 2600 MB/s write |
| $1500 unit + $300 Display | $4200 unit |
Modernization
Cheese Graters have great bones but there are things that must be improved to keep pace with current Apple machines. It starts with paving the right firmware bits and in the end requires a supported Metal GPU. Each modernization will differ but generally these are the basic steps needed to get a unit ready for Mojave.
Basic Mojave upgrade steps
- Add a boot NVMe drive to a PCIe adapter and plug into slot 2-4.
- Add at least 16 GB of DDR3 Memory
- Add an original GPU such as the GT 120 or Radeon 5770
- Make macOS High Sierra USB bootable installer
- Stick High Sierra bootable installer into USB port
- Boot up holding Option key to select High Sierra bootable installer as Startup disk
- High Sierra installer will prompt for Firmware update, follow instructions to update Firmware to MP51.0089.B00, which aligns with High Sierra 10.13.6
- After the Firmware install, close the installer and shutdown
- Remove the High Sierra bootable installer from USB port
- Open the Mac Pro, remove original GPU, add Metal supported GPU such as Radeon RX580
- Make macOS Mojave USB bootable installer
- Stick Mojave bootable installer into USB port
- Boot up, this make take a bit since it’s reading Mojave installer from USB
- The Mojave installer will prompt for a Firmware update, follow instructions to update Firmware to 144.0.0.0.0, which aligns with Mojave 10.14.6
- After the Firmware install, continue Mojave installation and install osx onto the NVMe drive
- After Mojave installation completes, reboot and have fun :)
References
- Mac Pro 2009
- Mac Pro 2009 Technician Guide
- Mac Pro 2010
- Mac Pro 2010 Technician Guide
- Apple Mac Pro 2012
- Everymac Single Core Specs
- Everymac Dual Core Specs
- Lycom DT-120 PCIe NVMe adapter
- Create a Bootable Installer
- Metal Compatible GPUs
- Vice Mac Pro Article
- Apple Insider Cheese Grater Article
- Greg Gant’s Excellent Mac Pro Upgrade Guide
- iFixit Mac Pro Firmware Upgrade Guide